These are the instructions for how to configure an iPhone or iPod Touch to check your WebMailPRO mail.
WebMailPRO, Apple iPhone, Apple iPod Touch
- Before you can configure the phone, your account must be setup for POP3 access. Contact your WebMailPRO administrator and they can do this for you by editing your user.
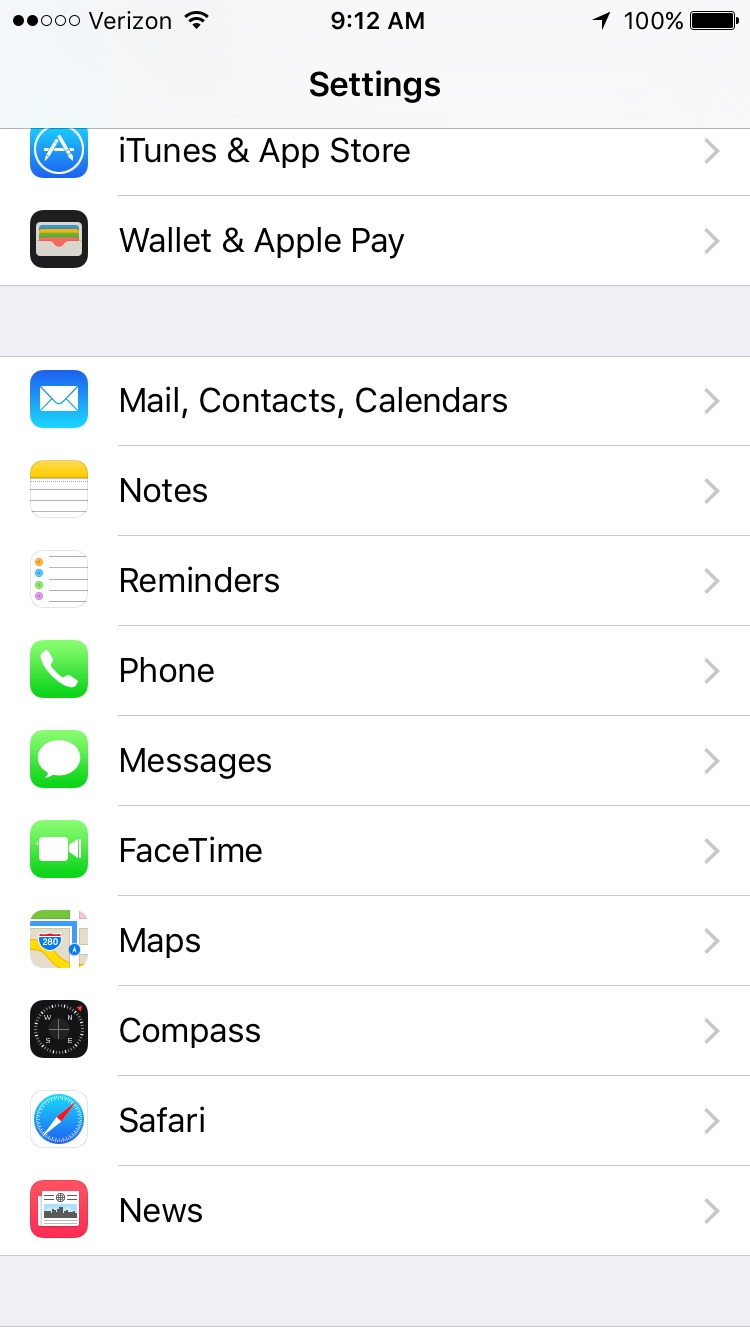
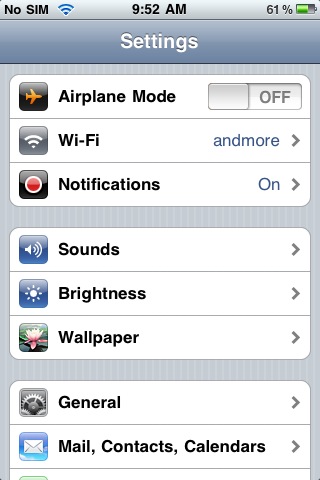
- In the application list, find and open Settings

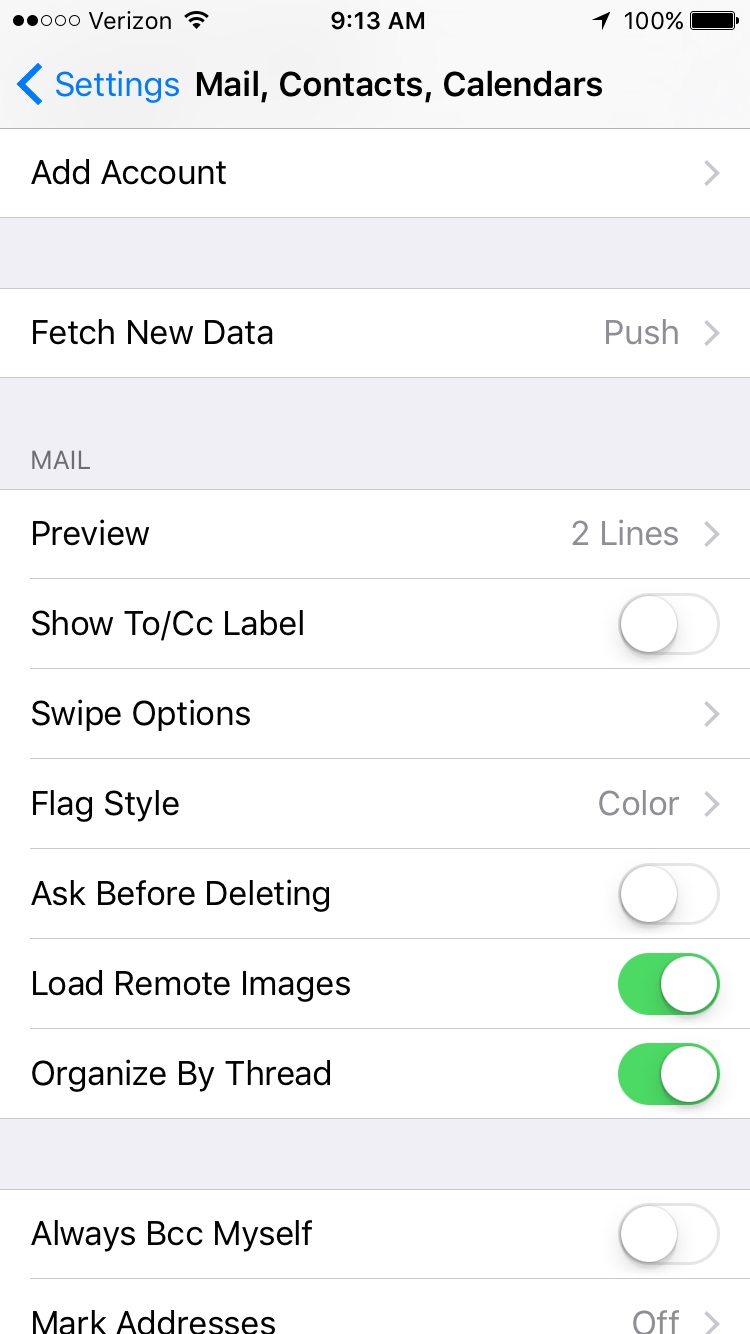
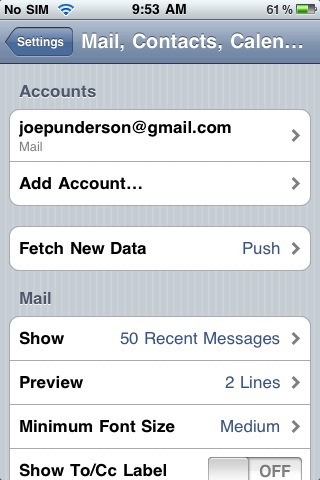
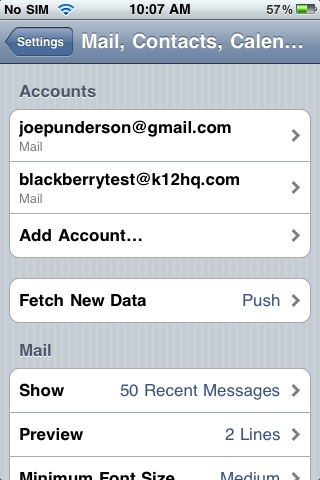
- Select “Mail, Contacts, Calendars”
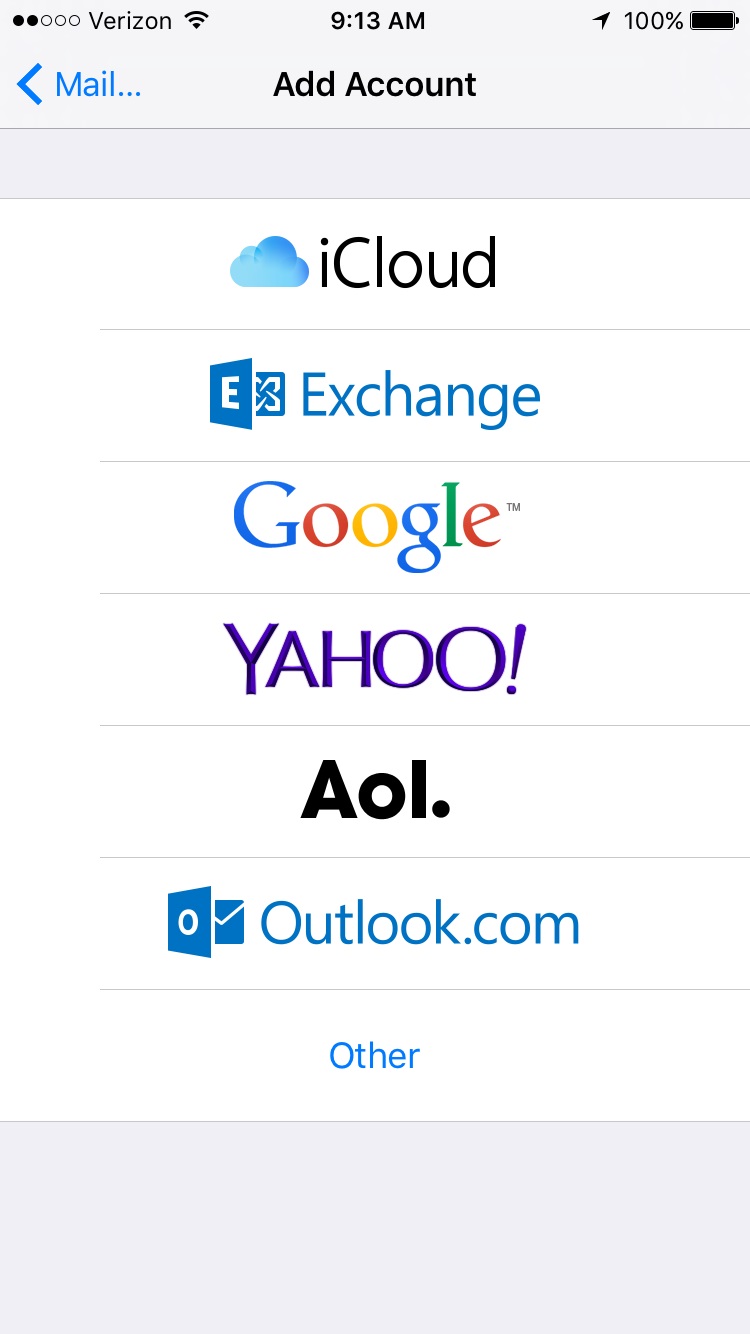
- In the “Accounts” section, select “Add Account”
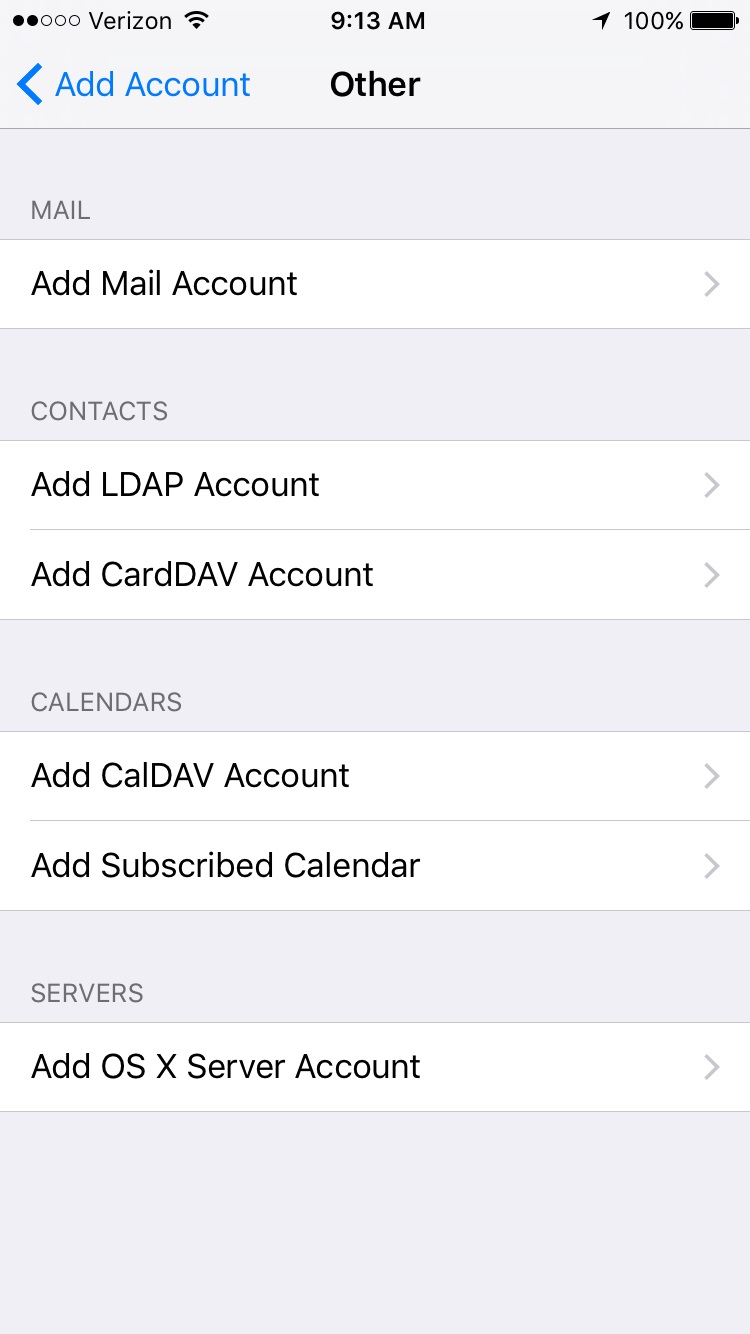
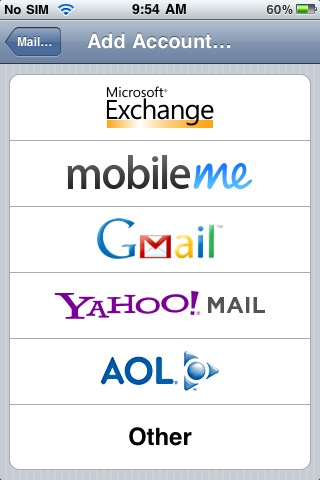
- Select “Other” for the type of account
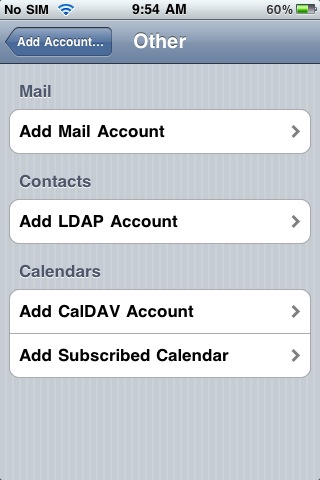
- Under “Mail”, select “Add Mail Account”
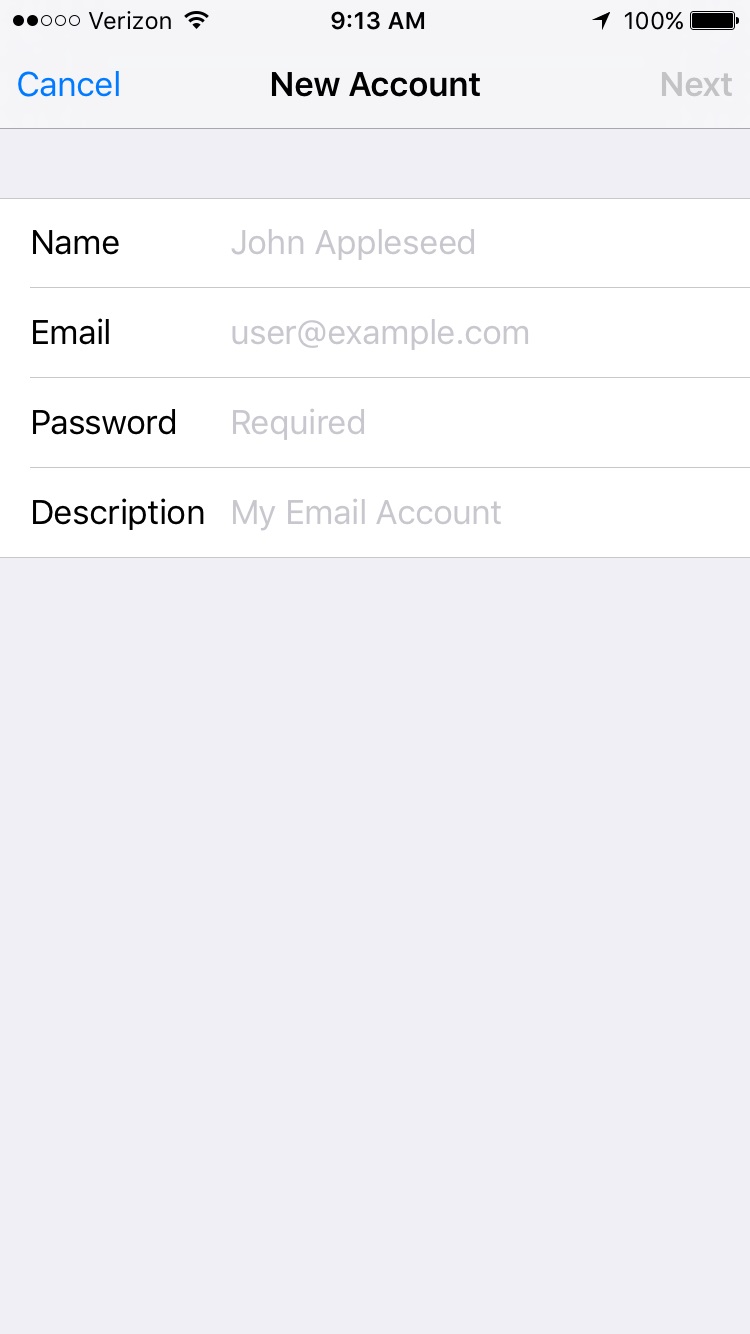
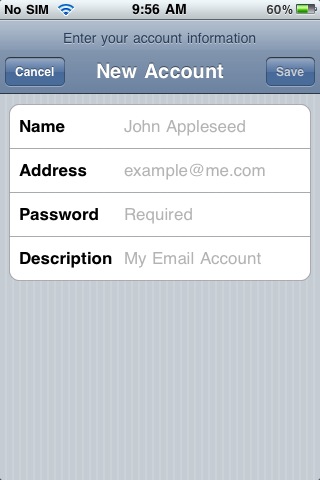
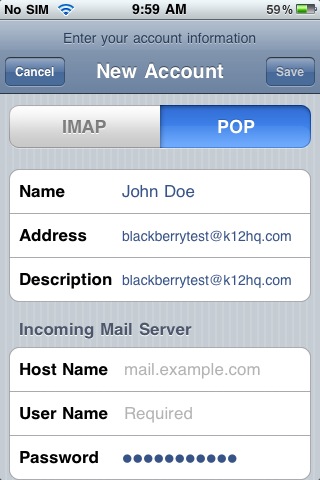
- Fill in Name, Address, and Password, then press “Save”
- On the New Account Screen, select “POP”
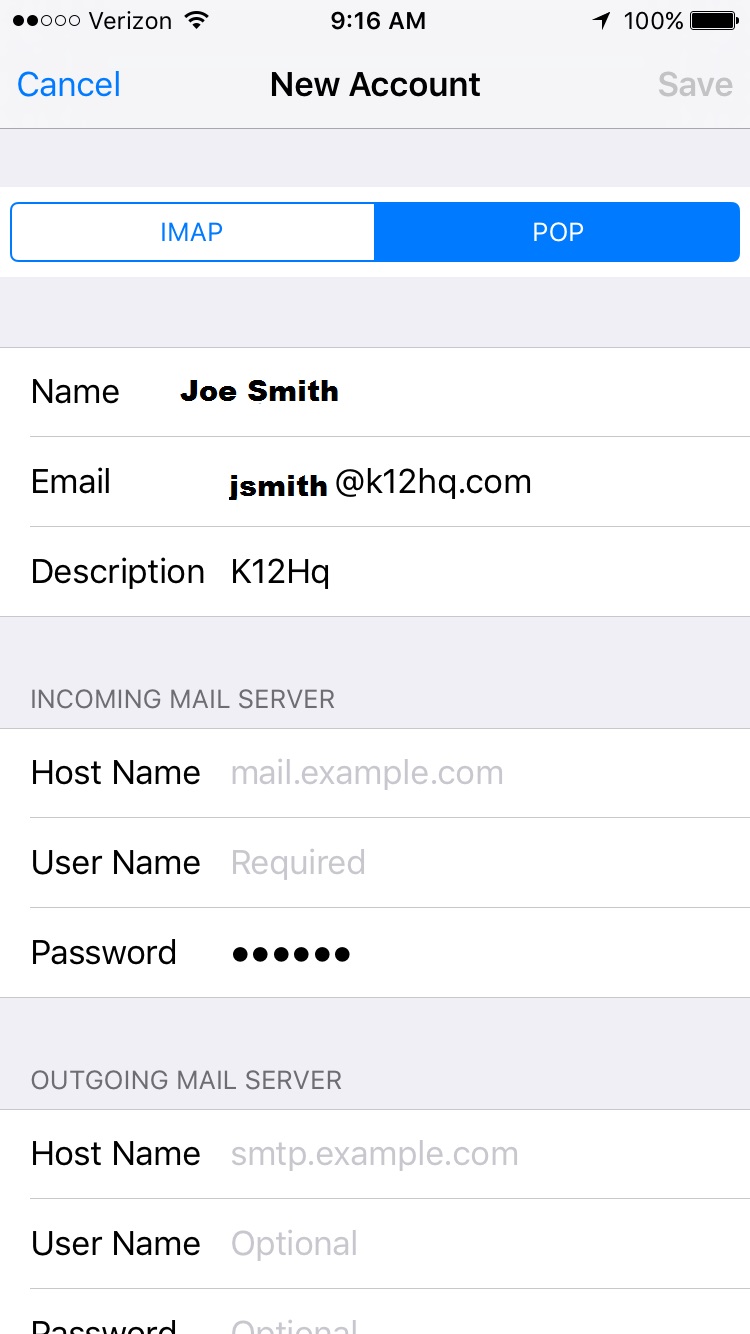
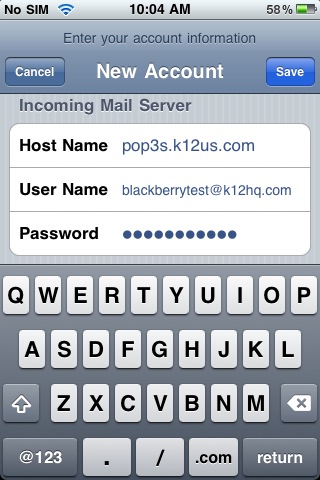
- Under “Incoming Mail Server”, fill in the following options:
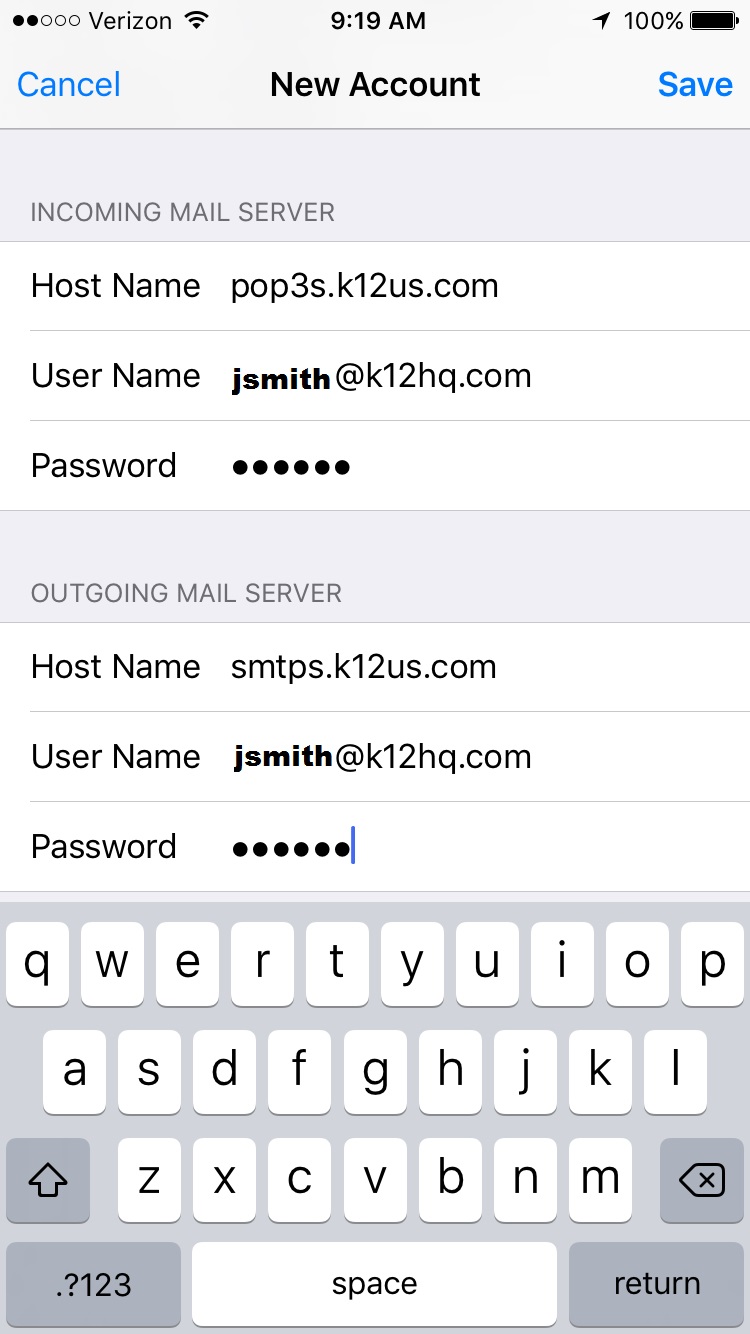
- Host Name: pop3s.k12us.com
- User Name: your full email address (ex. jsmith@k12hq.com)
- Password: your password
- Under “Outgoing Mail Server”, fill in the following options
- Host Name: smtps.k12us.com
- User Name: your full email address (ex. jsmith@k12hq.com)
- Password: your password
- Press “Save” in the top right corner.
- Once the wizard finishes, it will be back on “Mail, Contacts, Calendars”, with your new account listed
Before you can configure the phone, your account must be setup for POP3 access. Contact your WebMailPRO administrator and they can do this for you by editing your user.
In the application list, find and open Settings
 Select “Mail, Contacts, Calendars”
 In the “Accounts” section, select “Add Account”
 Select “Other” for the type of account
 Under “Mail”, select “Add Mail Account”
 Fill in Name, Address, and Password, then press “Save”
 On the New Account Screen, select “POP”
 Under “Incoming Mail Server”, fill in the following options:
- Host Name: pop3s.k12us.com
- User Name: your email address
- Password: your password
Under “Outgoing Mail Server”, fill in the following options
- Host Name: smtps.k12us.com
- User Name: your email address
- Password: your password

Press “Save”
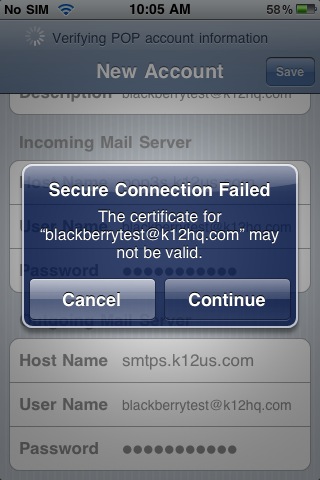
You will get a message “The certificate for ‘your email address’ may not be valid”. Press “Continue”
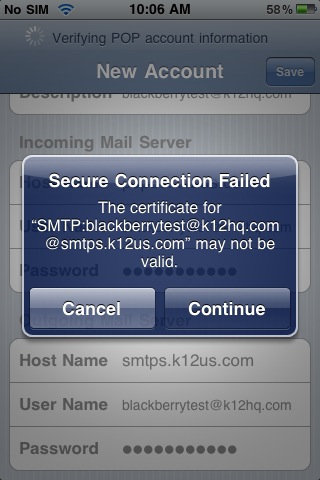
 You will get another message saying “The certificate for ‘SMTP:your email address’ may not be valid”. Press “Continue”
 Once the wizard finishes, it will be back on “Mail, Contacts, Calendars”, with your new account listed
Before you can configure the phone, your account must be setup for POP3 access. Contact your WebMailPRO administrator and they can do this for you by editing your user.
In the application list, find and open Settings
Select “Mail, Contacts, Calendars”
In the “Accounts” section, select “Add Account”
Select “Other” for the type of account
Under “Mail”, select “Add Mail Account”
Fill in Name, Address, and Password, then press “Save”
On the New Account Screen, select “POP”
Under “Incoming Mail Server”, fill in the following options:
- Host Name: pop3s.k12us.com
- User Name: your email address
- Password: your password
Under “Outgoing Mail Server”, fill in the following options
- Host Name: smtps.k12us.com
- User Name: your email address
- Password: your password
Press “Save”
You will get a message “The certificate for ‘your email address’ may not be valid”. Press “Continue”
You will get another message saying “The certificate for ‘SMTP:your email address’ may not be valid”. Press “Continue”
Once the wizard finishes, it will be back on “Mail, Contacts, Calendars”, with your new account listed
Before you can configure the phone, your account must be setup for POP3 access. Contact your WebMailPRO administrator and they can do this for you by editing your user.
In the application list, find and open Settings
Before you can configure the phone, your account must be setup for POP3 access. Contact your WebMailPRO administrator and they can do this for you by editing your user.
In the application list, find and open Settings
Before you can configure the phone, your account must be setup for POP3 access. Contact your WebMailPRO administrator and they can do this for you by editing your user.
In the application list, find and open Settings
More Information – IOS 6 & 7
- Before you can configure the phone, your account must be setup for POP3 access. Contact your WebMailPRO administrator and they can do this for you by editing your user.
- In the application list, find and open Settings
- Select “Mail, Contacts, Calendars”
- In the “Accounts” section, select “Add Account”
- Select “Other” for the type of account
- Under “Mail”, select “Add Mail Account”
- Fill in Name, Address, and Password, then press “Save”
- On the New Account Screen, select “POP”
- Under “Incoming Mail Server”, fill in the following options:
- Host Name: pop3s.k12us.com
- User Name: your email address
- Password: your password
- Under “Outgoing Mail Server”, fill in the following options
- Host Name: smtps.k12us.com
- User Name: your email address
- Password: your password
- Press “Save”
- Once the wizard finishes, it will be back on “Mail, Contacts, Calendars”, with your new account listed
Before you can configure the phone, your account must be setup for POP3 access. Contact your WebMailPRO administrator and they can do this for you by editing your user.
In the application list, find and open Settings
Select “Mail, Contacts, Calendars”
In the “Accounts” section, select “Add Account”
Select “Other” for the type of account
Under “Mail”, select “Add Mail Account”
Fill in Name, Address, and Password, then press “Save”
On the New Account Screen, select “POP”
Under “Incoming Mail Server”, fill in the following options:
- Host Name: pop3s.k12us.com
- User Name: your email address
- Password: your password
Under “Outgoing Mail Server”, fill in the following options
- Host Name: smtps.k12us.com
- User Name: your email address
- Password: your password
Press “Save”
You will get a message “The certificate for ‘your email address’ may not be valid”. Press “Continue”
You will get another message saying “The certificate for ‘SMTP:your email address’ may not be valid”. Press “Continue”
Once the wizard finishes, it will be back on “Mail, Contacts, Calendars”, with your new account listed
Before you can configure the phone, your account must be setup for POP3 access. Contact your WebMailPRO administrator and they can do this for you by editing your user.
In the application list, find and open Settings
Before you can configure the phone, your account must be setup for POP3 access. Contact your WebMailPRO administrator and they can do this for you by editing your user.
In the application list, find and open Settings
Before you can configure the phone, your account must be setup for POP3 access. Contact your WebMailPRO administrator and they can do this for you by editing your user.
In the application list, find and open Settings


